Monday, 30 April 2012

Flying South for the Winter


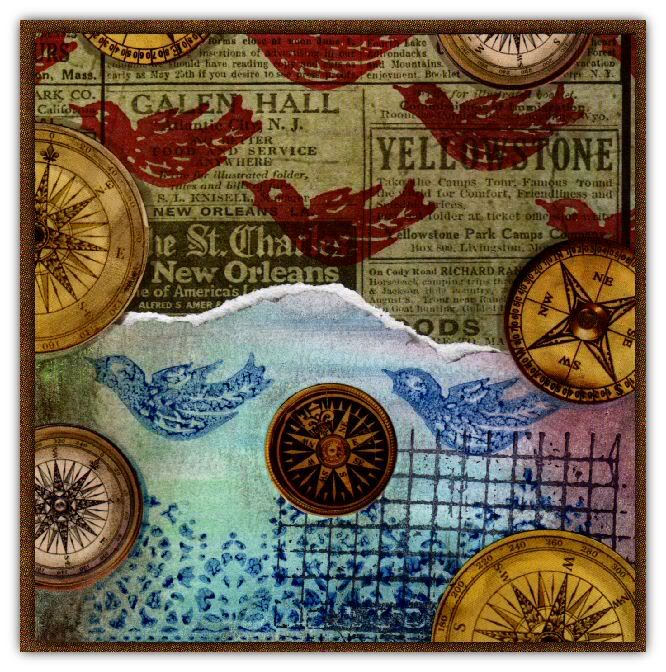
This weeks theme on the Simon Says Stamp and Show Challenge is "a kaleidoscope of colour".  I was lucky enough to get to try out some art materials by Faber-Castell on this piece. 

They do a "big brush stamper pen" which is a large, brush-tipped india ink marker which can be coloured right onto a stamp.  I used a red (geranium) and a blue to stamp the birds and damask border and they work a treat! :)  They also make a crayon-y kind of thing called gelatos, which are great because they can be blended with water.  I used 4 colours on my background, spritzed it and then blended them with my finger.  I used the chocolate gelato to antique the compasses I used too.  I can see me using both the gelatos and the stamper's pens in the future! :)

Our ever-generous sponsor Simon Says Stamp is offering a $50 gift voucher as the prize again this week, just make something for the challenge and you could the winner! The winner will be chosen at random from those who enter the challenge, so why not give it a try? At the very least why not head over to the Challenge Blog to see how the other members of the design team have interpreted this weeks theme! :)

Monday, 23 April 2012

There's No Word Like "Home"


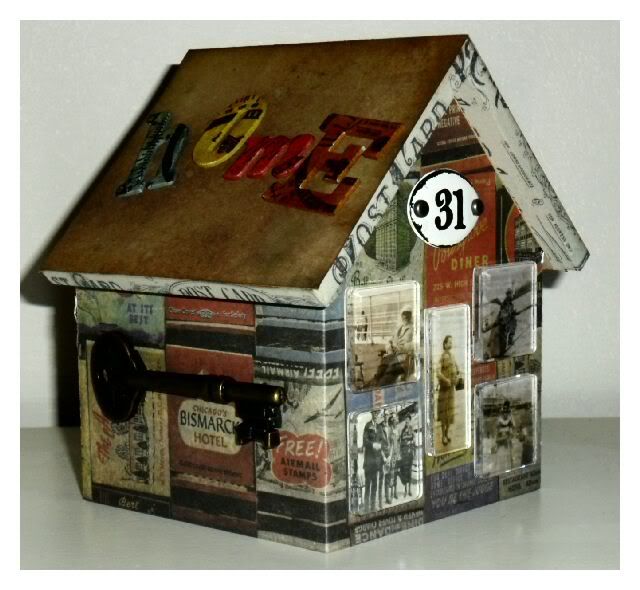
This weeks theme on the Simon Says Stamp and Show Challenge is "Favourite Word".  Now, my favourite word is probably "aubergine", particularly the way that French people say it, but I don't have any stamps of aubergines and I didn't fancy making something purple!  Consequently, for the purposes of this week's challenge, my favourite word is "home".

I used Tim Holtz's Destinations and Lost and Found card stacks to cover the house, taking photographs from one of the pages and sticking them to the back of some Tim's fragments.  The grunge board letters were coloured with Distress Markers and stamped with an image from the Road Trip stamp set.  The roof was edged with tissue tape and I added a word key to each side.  To finish it off, I added a placquette to the front, and there you have it! :)

Our ever-generous sponsor Simon Says Stamp is offering a $50 gift voucher as the prize again this week, just make something for the challenge and you could the winner! The winner will be chosen at random from those who enter the challenge, so why not give it a try? At the very least why not head over to the Challenge Blog to see how the other members of the design team have interpreted this weeks theme! :)
Monday, 16 April 2012

The Road to Distressville

This weeks theme on the Simon Says Stamp and Show Challenge is "Anything Goes".  I signed up for Tim Holtz's Creative Chemistry 101 class recently (though I haven't yet had the time to work through the classes) and one of the things he talks about is using Distress Markers to outline the edge of stencilled designs.  As I'm really enjoying using stencils at the moment, I thought I'd try that technique out on this piece.  I used a star stencil with Barn Door distress ink applied with an ink blending tool and edged the stars with Aged Mahogany Distress Marker.  I really like the crisp definition it's given to the stars and will be doing more of this in the future! :)

I used a piece from the Kraft Resist pad as the background and stamped the blue rays first, then stencilled the stars on top.  I love how the glazed letters and words on the cardstock aren't affected by the ink and show through strongly.  I stamped the tire tread from Tim's Road Trip stamp set onto white card with Shabby Shutters Distress Ink and then stamped the words on top in black.  I cut it out and mounted it onto black card.  The route 66 shield was stamped on white card and cut out, then I applied walnut stain ink to the main panel to create a shadow where the shield was going to go and stuck it in place.  I edged the whole panel with walnut stain and matted it onto black card.  Finally I fixed the route 66 in place.

Our ever-generous sponsor Simon Says Stamp is offering a $50 gift voucher as the prize again this week, just make something for the challenge and you could the winner! The winner will be chosen at random from those who enter the challenge, so why not give it a try? At the very least why not head over to the Challenge Blog to see how the other members of the design team have interpreted this weeks theme! :)

Monday, 9 April 2012

Who? Me? Wrinkle-free?

This weeks theme on the Simon Says Stamp and Show Challenge is "A Tim Holtz Technique".  I used the wrinkle-free distress technique along with some pale spring colours to make a gift box that my niece needed for a necklace she'd made.  I stamped with Picket Fence distress stain, it gives a great subtle effect! :)

Our ever-generous sponsor Simon Says Stamp is offering a $50 gift voucher as the prize again this week, just make something for the challenge and you could the winner! The winner will be chosen at random from those who enter the challenge, so why not give it a try? At the very least why not head over to the Challenge Blog to see how the other members of the design team have interpreted this weeks theme! :)

Tuesday, 3 April 2012

I've been interviewed!

Over on Sarah's blog, I've been the subject of her monthly interview, "My Featured Artist".  She really shone the spotlight in my eyes and gave me a good grilling!  (I'm still not sure if she was good cop or bad cop lol).  Check it out here.

Monday, 2 April 2012

Facing up to Studio 490!

This weeks theme on the Simon Says Stamp and Show Challenge is "Inspiration Studio 490".  Wendy Vecchi releases some fantastic stamps under her Studio 490 label, and I particularly love these faces and the distressed lines background that I used.  The background was coloured with Old Paper distress stain, and everything else was coloured with Promarkers.  As ever with Promarkers, I stamped with Memento Tuxedo Black, to avoid the stamped image bleeding when it was coloured.

Our ever-generous sponsor Simon Says Stamp is offering a $50 gift voucher as the prize again this week, just make something for the challenge and you could the winner! The winner will be chosen at random from those who enter the challenge, so why not give it a try? At the very least why not head over to the Challenge Blog to see how the other members of the design team have interpreted this weeks theme! :)

Friday, 30 March 2012

Coney Island!

Not much to say about this one really!  Some new stamps arrived today, mostly some of Tim Holtz' newbies, and I wanted to have a quick play with them, even if it was only for a few minutes before bed! :)

Thursday, 29 March 2012

Stitch Girl

Well, I started this card with the intention of making another slight dent into my mountain of patterned paper, and it was hugely successful - I now have two 5 inch squares less than I had before! lol

I started out by scraping layers of red, teal and white paint onto the cardstock, then overstamping the image, which I painted with Distress Stains applied with a water brush.  Finally I stamped the faux stitching.  The mat was the same cardstock as the main panel, and I darkened it's edges with a dark grey promarker to provide a little contrast.

Ta for looking! :)

Wednesday, 28 March 2012

Messing about on the iPad

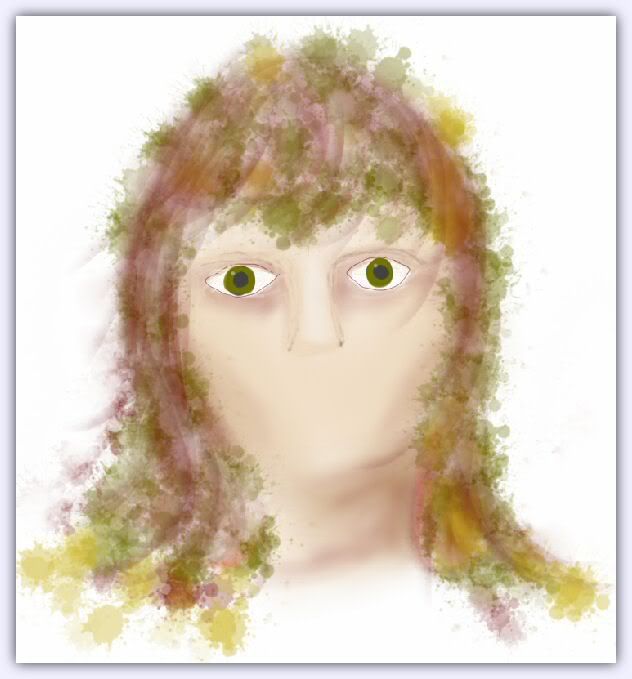
I'm not the world's greatest sketch artist (to put it mildly, lol), but yesterday I got hold of Sketchbook Pro for the iPad and have had great fun finger-painting with the various brushes and pens that come with it.  This is the first drawing I did, I'm not sure if I'll do a lot of sketching with it, but it might while away the odd hour on a plane or train at some point! :)

Tuesday, 27 March 2012

Faux Frame

This is just one layer of white card, I used masking to give the effect of a frame border on it, which I highlighted with a white pen.  I'm still loving stencilling :)  - the circles you can see, but there are also some stars peeping out above the boys head.

I coloured the whole card with blended red and yellow distress ink, stencilled the stars and then stamped the image in black.  I masked off the image and stencilled, stamped and coloured the frame.  I used a white pen to create the sketchy border around the edge and then finally I stamped the image again on printer paper, cut out the boy and fixed him to the background.  Job done! :)
Related Posts with Thumbnails