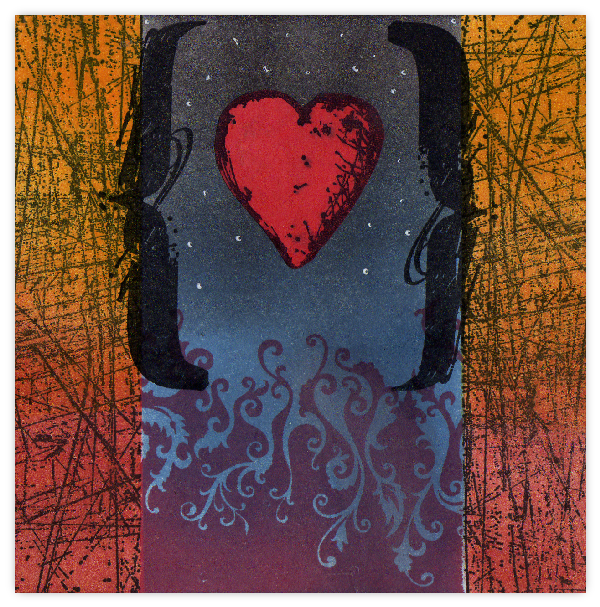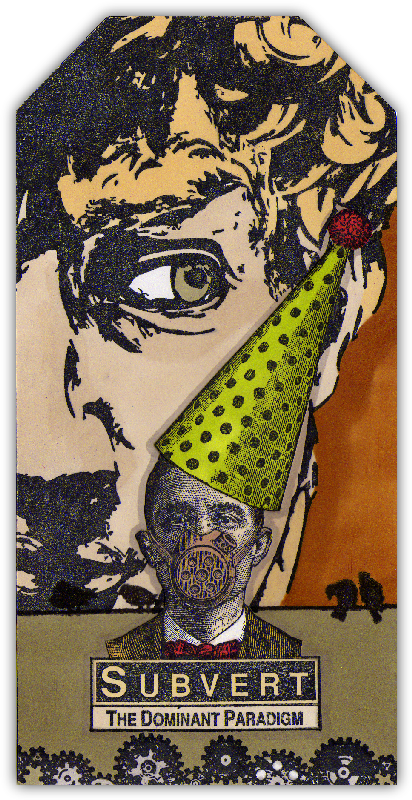
Please forgive me, I'll try to do better in future. Oh, and I hope you like the tag :)
Thursday, 18 February 2010
Promarking Time
Please forgive me, I'll try to do better in future. Oh, and I hope you like the tag :)
Labels:
Leavenworth Jackson
,
promarkers
,
stampers anonymous
,
stamping
,
tag
,
tim holtz
Wednesday, 17 February 2010
Sleep Alone Book
This is based around a song by the 1 woman band "Bat for Lashes", and I've wanted to make a book of it for ages but only had the chance to start it today. If you haven't heard of the song and want to hear it, it's on youtube here.
The pages differ in style, but I tried to keep the blue/night/twilight feel consistent throughout. It's not bound yet, I need to get some chipboard to make covers for it. Some of Tim Holtz's new stamps lent themselves very well to this project! I hope you like it :o)
Give my soul, give my soul, sing it free across the sea
A lonely spell to conjure you, but conjure hell is all I do
Drive my heart, drive my heart, into the fire of a burning heart's desire
A lonely spell so you be seen, do you hear me coming in my blue dream
The pages differ in style, but I tried to keep the blue/night/twilight feel consistent throughout. It's not bound yet, I need to get some chipboard to make covers for it. Some of Tim Holtz's new stamps lent themselves very well to this project! I hope you like it :o)
No sweetheart in the dark to call my own
You’re my own, you’re my own, I can sing it, I can groan
But the darkness is a stranger and I'm lonely, lonely, lonely low
Last night's parties and last night's horrorshow
Smiling and whirling and kissing all I know
But the darkness is a stranger and I'm lonely, lonely, lonely low
Smiling and whirling and kissing all I know
A lonely spell to conjure you, but conjure hell is all I do
From every sun ascending a lonesome moon will grow (grow, grow, grow)
A lonely spell so you be seen, do you hear me coming in my blue dream
Labels:
distress ink
,
mini-book
,
promarkers
,
stamping
,
tim holtz
Tuesday, 16 February 2010
Trading Places!
Although I've had some grungepaper for ages, this is the first time I've ever used it! The biggest problem is that the butterflies should have tiny beads along their bodies, and though I knew this, it was just one step too far outside my comfort zone for me to do it! LOL Having said that, I don't think I did too badly! If you're not familiar with Linda's style, check out her blog
http://acraftingjourney.blogspot.com/
and let me know how well (or badly!) I did :o) You should also be able to see her "Dan tag" - Did she capture my style? Like the beads on this tag, she also did one thing on hers that I would never do - can you spot what it is? It was a lot of fun, as was the whole visit - thanks to Linda for being such a great and fun host, and to her partner John for some delicious meals! :o)
Labels:
distress ink
,
grungepaper
,
stamping
,
tag
,
Wendy Vecchi
Monday, 15 February 2010
Freebie #43!
A Freebie Eggstravaganza!
[I've started to make my files available from my blog again and am adding a new set each week. Check out the "Cutting Files" tab at the top of the page to see which ones are available for download.]
A couple of days late, but hopefully better late than never!
It's that time of year again.... Christmas and Valentine's Day are out of the way, which means Easter isn't far off! Use these fun egg designs on cards, layouts or for easter themed home decor, the choice is yours!
Please remember you are only allowed to download this file for your own use and may not distribute it to others in any form. I spend a great deal of time creating my designs, please respect the terms under which they are given.
Again, this template will be "live" for 1 week. Next week it will be taken down, and new ones will replace it. Don't forget, if you have any requests, pass them on! I can't promise, but I will take suggestions into account when planning future templates.
These files may not be uploaded to a group, forum or website for sale or redistribution, or shared among individuals. They are expressly for the personal use of each person that downloads them from this blog.
There are 2 files and I have put them into a zip file to make downloading easier. After saving it, open in the usual way, and drag the files out onto your desktop or wherever you wish to save them.
There are 2 versions of each template:
Any feedback on the templates is more than welcome, and if you have any suggestions for possible future templates you'd like to see, please let me know! If you make anything using one of the templates, please post a link to it here so that others can be inspired by how you've used them!
I hope you like the templates - let me know how you get on! :)
[I've started to make my files available from my blog again and am adding a new set each week. Check out the "Cutting Files" tab at the top of the page to see which ones are available for download.]
It's that time of year again.... Christmas and Valentine's Day are out of the way, which means Easter isn't far off! Use these fun egg designs on cards, layouts or for easter themed home decor, the choice is yours!
Please remember you are only allowed to download this file for your own use and may not distribute it to others in any form. I spend a great deal of time creating my designs, please respect the terms under which they are given.
Again, this template will be "live" for 1 week. Next week it will be taken down, and new ones will replace it. Don't forget, if you have any requests, pass them on! I can't promise, but I will take suggestions into account when planning future templates.
These files may not be uploaded to a group, forum or website for sale or redistribution, or shared among individuals. They are expressly for the personal use of each person that downloads them from this blog.
There are 2 files and I have put them into a zip file to make downloading easier. After saving it, open in the usual way, and drag the files out onto your desktop or wherever you wish to save them.
There are 2 versions of each template:
- An SVG version which can be imported into the Sure Cuts a Lot or Make the Cut program and then cut out on your Cricut.
- A DXF version which is Craft Robo friendly, and ready to be imported into your Robomaster software (I'm not a Robo user, so if there are any problems with this, please let me know!)
Any feedback on the templates is more than welcome, and if you have any suggestions for possible future templates you'd like to see, please let me know! If you make anything using one of the templates, please post a link to it here so that others can be inspired by how you've used them!
I hope you like the templates - let me know how you get on! :)
Templates © dan99crafter@gmail.com 2009
Sunday, 14 February 2010
David Card 3
The head was stamped in black Versafine and coloured with Antique Linen distress ink. It was then masked off and the background was coloured with Fired Brick and Spiced Marmalade distress inks and stamped with the Wendy Vecchi alphabet background stamp.
I made a mask for the shading areas on the nose, eye and cheek and stamped a Wendy Vecchi text background stamp with Brushed Corduroy distress ink. Finally I painted out the white of the eye with acrylic paint. Click on the image for a larger view! :o)
Labels:
distress ink
,
masking
,
stampers anonymous
,
stamping
,
tim holtz
,
versafine
Saturday, 13 February 2010
David Card 2
The head was masked and distress inks applied to the background with a foam pad. TH's scratches stamp finished off the background.
Simple, straightforward but effective I think! Click on the image for a larger view :o)
Labels:
acrylic paint
,
distress ink
,
promarkers
,
stampers anonymous
,
stamping
,
tim holtz
Friday, 12 February 2010
David Card 1
Nothing too complicated going on with this card, the head was stamped and then coloured with promarkers. The head was then masked and the stripes were stamped with a Cardinal Ancient Page ink pad.
That's all for now, click on the image if you want a larger view! :o)
Labels:
Ancient Page
,
promarkers
,
stamping
,
tim holtz
,
versafine
Thursday, 11 February 2010
Love Me, Do
I stamped the edges of the card with a Wendy Vecchi text background stamp and then applied Shabby Shutters distress ink to colour the card. The flourishes were from one of Tim Holtz's new stamp sets that were launched at CHA recently, and were highlighted with a Ranger white pen.
The large heart was cut roughly by hand and splodged with white and red acrylic paint which acted as a resisit for the Brushed Corduroy ink I applied once the paint was dry. It was matted onto a heart cut from brown card and then matted again onto a white card heart that was stamped with parts of a Wendy Vecchi gingham stamp, masking each part before stamping the next. The small gingham hearts were punched out of white cardstock and stamped with the same gingham stamp.
The little man was stamped on white cardstock and then coloured with Promarkers. He was cut out and mounted on the card using 3d foam. His heart was punched and mounted with foam too. And that's about it! I hope you like it, click on the image if you'd like to see a larger view! :)
Labels:
acrylic paint
,
distress ink
,
stampers anonymous
,
stamping
,
stampotique
,
tim holtz
Wednesday, 10 February 2010
Believe Tag 2: Armed and Dangerous
Well, not so much armed and dangerous as a sequel :) A long while back I posted a tag here that I'd made for a swap I was involved in (see it here).
At the time I said I wasn't very happy with it and would give it some more thought. I've only just realised that I forgot to post the final version, so I'm correcting that omission now! I almost (but not quite!) like the back better than the front, LOL Click on either image to see a larger version.


Front: The Santa stamp is one of Sir T!m's, the "BELIEVE" was printed from the computer. The bookplate was gilded and sanded. The "25" was cut on the Cricut and then inked and stamped. The baubles were cut with a circle punch, the hanging loops on them were cut on the Cricut. The toy soldier was cut from a piece of PP. The snowflakes in the background were stamped and embossed in white then the 2 shades of distress ink blue and black were applied with foam.
Back: Stamps by Elements (a Canadian company who were going to let me spend a day with them when I was in Vancouver, observing how stamps are made, but our diaries never matched up!). Coloured with Distress Ink pads applied with a water brush.
At the time I said I wasn't very happy with it and would give it some more thought. I've only just realised that I forgot to post the final version, so I'm correcting that omission now! I almost (but not quite!) like the back better than the front, LOL Click on either image to see a larger version.
Front: The Santa stamp is one of Sir T!m's, the "BELIEVE" was printed from the computer. The bookplate was gilded and sanded. The "25" was cut on the Cricut and then inked and stamped. The baubles were cut with a circle punch, the hanging loops on them were cut on the Cricut. The toy soldier was cut from a piece of PP. The snowflakes in the background were stamped and embossed in white then the 2 shades of distress ink blue and black were applied with foam.
Back: Stamps by Elements (a Canadian company who were going to let me spend a day with them when I was in Vancouver, observing how stamps are made, but our diaries never matched up!). Coloured with Distress Ink pads applied with a water brush.
Labels:
Cricut
,
embossing powder
,
SCAL
,
stampers anonymous
,
stamping
,
Sure Cuts a Lot
,
tim holtz
Tuesday, 9 February 2010
Citizen Kane ATC
Back in the day (you know, in the days of yore), I was on a forum that had an ATC challenge every Friday evening, and one week the theme was "favourite movie". Citizen Kane is one of those movies that always comes top, or near top, of the movie polls, but that no one actually likes. I must be the exception, I LOVE this movie, so it was a clear choice for this project!
I made a triptych ATC (you don't even want to know how much work it took to get those shaped doors to match up with the images on both sides of them!). You can see it closed and open here, along with the sleeve pocket I made to store it in. Obviously, this is another of my pieces before I started stamping! I hope you like :) Click on the image for a more detailed view, comments welcomed!
Subscribe to:
Posts
(
Atom
)