Saturday 25 December 2010

Merry Christmas!!

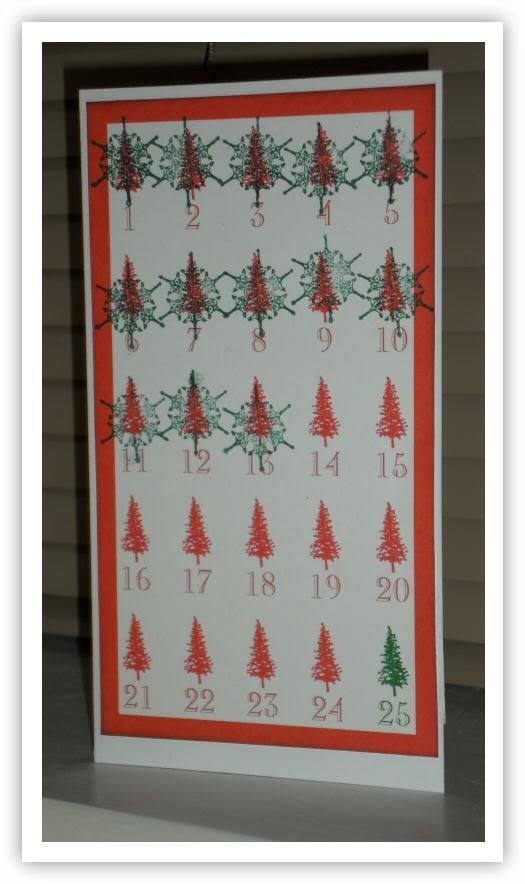
Hi all, just a quick note to wish you all the best of everything for the holidays!! As this is my first Christmas in this house, friends asked me to take some photos, so I've included one here, I hope you like it! :)

Have a wonderful time everyone, whether you're spending the holiday on your own or surrounded by family and friends, and I'll see you back here in the new year, restored and reinvigorated! :)

Dan x

Thursday 23 December 2010

It's a One-Pad Wonder!

Well, perhaps not a wonder, but I'd set myself a little challenge, and it's true that all that was used to produce this card was 1 inkpad and a white paint dabber! The inkpad in question was Weathered Wood Distress Ink and all stamps were by Tim Holtz @ Stampers Anonymous. Would you like to know how it was done? You would? Then if you're sitting comfortably, I'll begin! :)

The dabber was rubbed along the bottom edge of a rectangle of white card and dried with a heat gun. Using an ink blending tool, a light background of weathered wood was applied to the rest of the card. Tim Holtz's "sun ray" kinda stamp was inked with WW and stamped, then quickly rubbed with a moist wipe to knock back the colour a little. The painted area was also wiped to return it to white and remove any of the stamped image that was on it.

Santa was stamped separately with WW and his face was gently rubbed with the corner of the ink blending tool used earlier, which gave his face the appearance of shaded colouring. He was cut out and stuck into place on the card. The Season's Greetings stamp was inked with WW and stamped on the card, then a mat was cut and edged with WW direct from the pad, to give a darker effect. Finally everything was stuck onto the background card blank. There you go, it was easier than you thought :) I hope you like it! As ever, click the image for a better view :)

Wednesday 22 December 2010

Snow, Pine & Mahogany...

... is the theme over on the Gingersnap Creations blog this week. I used white acrylic paint and aged mahogany & pine needles distress inks to get me in the right colour zone on this tag.

I had just gotten these new stamps from Stampotique a day or so earlier and was keen to try them out! Add to that a bit of experimentation with a range of white pens to see which I liked best (not tried the Sakura Souffle yet, so the jury is still out!) and lots of doodling, scratching, scuffing and messing about, and this is what you get! :)

I discovered during the course of making this tag that if you use a heat gun to speed up the drying of a Sakura white glaze pen you only have a second or so to turn off the heat before the glaze turns transparent! I used that effect to write a lot of text on this tag which I then made transparent, so it can only be read by moving the tag around until that the clear glaze catches the light. (Interesting for those who actually have the tag in their hands, but perhaps not so much for you, dear reader!)

Pop over to the GC blog to see how the other DT members have interpreted the challenge - go on, you know you want to! :)

Monday 20 December 2010

The Tattoos are Alive!!

The theme over on the Simon Says Stamps and Show Challenge blog this week is "something from yesteryear". I recently got these Calais stamps from 7gypsies, and they really remind me of vintage tattoo designs, particularly the rose and the swallow, so I thought they'd be perfect for this challenge!

I combined them with some of Tim Holtz's classic images to create this shadow box. I kinda think it looks a little like the tattoos have come to life and gone out to play! lol Then again, maybe I've just been at the sherry a bit too much, lol Click on the pic for a larger view!

Our ever-generous sponsor Simon Says Stamp is offering a $50 gift voucher as the prize again this week! The winner will be chosen at random from those who enter the challenge, so why not give it a try?


Tuesday 14 December 2010

Don't Panic!!!!

According to my home-made advent card (on which I have been dutifully stamping the passing days with a TH snowflake stamp) there are only TWELVE days left 'til Christmas. TWELVE!

TWELVE!!!

There are still trees to decorate, pies to make, cakes to bake, new freezer to arrive, new bookcases to arrive, art to go on walls, mirrors to go in those places where folks might think "Wouldn't it be really useful if there was a mirror right there?", gifts to wrap, gifts to BUY, wreaths to hang, wreaths to MAKE, and nowhere near enough time to fit it all in.

Can I borrow an igloo and hide away 'til it's all over? :) Not really, I LOVE IT! :)

Look, I can even dress up for the holidays! :)

Monday 13 December 2010

Christmas Tree Houses

Well, as you can see, I decided in the end not to put my Christmas village under my tree, but to hang them on a different tree!

Over on the Simon Says Stamp & Show Challenge blog today the new theme is "A Tim Holtz Technique". I decided to use the embossed resist technique. I cut the houses from white cardstock and coloured them with Barn Door and Pine Needles distress ink pads, after first stamping and embossing with clear embossing powder. All stamps were by Tim Holtz @ Stampers Anonymous. Even more amazing, I've actually taken a decent photo of the finished item! :) Click on the pic for a larger view!

Our ever-generous sponsor Simon Says Stamp is offering a $50 gift voucher as the prize again this week! The winner will be chosen at random from those who enter the challenge, so why not give it a try?


Saturday 11 December 2010

Starry starry day

I guess it was inevitable that day would follow night, huh? :)

Plus I still had a lot of star die cuts left from last night, and it would be a shame to have let them go to waste!

Enjoy :) click on the image for a larger view - comments appreciated!

Friday 10 December 2010

Starry starry night

Stars kept cropping up in my world today! First I was admiring some starry tags on Dina Wakely's blog, which got me in a starry mood. I sat down at the computer to make some starry die cuts for the cricut and had a bit of a surf around only to find that my friend Linda had posted a starry card that she'd been making yesterday. Clearly I was MEANT to make a starry thing - it was written in the stars! :)

I had a play around with distress ink pads, getting some saturated splotches of colour on my tag, before stamping and ink blending. I had a bit of a doodle too, with both black and white pens. Not too much else to say about it really, it is what it presents itself as :) Comments encouraged and appreciated! Click on the image to see a larger view.

Tuesday 7 December 2010

Tim's 12 Tags of Christmas 2010, #5

Yes, yes, I know I've missed out #2, 3 and 4! What can I say? There aren't any Timtag police looking over my shoulder so I figure I'm pretty much free to suit myself :)

Quite a few differences with this one again - I didn't like the technique where white paint was dabbed over the stamped image of Santa, so I stamped mine separately, to keep the beard white and then stuck it in place, after colouring it with Promarkers. I didn't have the green label die thingy, or the metal flowers or the metal 25, so I cut substitutes for them all on the Cricut.

Oh, and at the last minute I realised I'd forgotten the strip of music paper, so there's just a bit of that. I know, I should have looked at the original more often during the process, but the microwave dinged and I had to get my chilli out. (Did you know that the Welsh for microwave is something like "pingety ping"? They said so on tv last week. Isn't that great? I'd love to speak a language that let me say pingety ping from time to time :) Oh, and I can't find my stickles. None of them. Hence the bling-free holly. Anyway, stop picking holes in it, I did my best. Tim doesn't want me to follow him slavishly you know, he wants me to be inspired and go my own way, whatever that is.

In case you hadn't noticed, the centre of the flower is identical to the outer, except smaller. That's me, playing with ideas of scale. And you thought there was no thought behind this stuff :) As ever, click on the image for a better view! :)

Monday 6 December 2010

Poinsettia Garland Card

Over on the Simon Says Stamp & Show Challenge blog today the new theme is "Holiday Greeting". On this card I've taken a foliage spray that isn't part of a Christmas stamp set and used a colouring technique to turn it into a folk art poinsettia garland.

This technique borrows from the screen-printing process, which starts when the final image is broken down into it's separate colours. Each colour is then printed separately, one on top of the next, until the image is complete. I have done the same thing here by stamping different parts of the image one on top of the next, in different colours. You may never get the images to line up 100% perfectly each time, but that's part of the charm with this technique!

The garland was first stamped with Barn Door distress ink. The stamp was then re-inked, this time with Pine Needles distress ink and I used a moist baby wipe to remove the ink from the parts of the stamp that I wanted to stay red. I then stamped in the same position, giving the 2-colour effect shown here. The ticket used the same technique, but with a 3rd colour, black.

Our ever-generous sponsor Simon Says Stamp is offering a $50 gift voucher as the prize for each week in December! The winner will be chosen at random from those who enter the challenge, so why not give it a try?


Friday 3 December 2010

Tim's 12 Tags of Christmas 2010, #1

It's December again, so it must be time for Tim Holtz to delight us with his daily "12 Tags of Christmas"!

There were quite a few "bits" that I didn't have to complete this tag as demonstrated by Tim in his instructions, as follows:

House - I don't have his wonky house die and my Cuttlebug is packed away in a box somewhere, so I could neither cut it out or emboss it with his notepaper folder. Instead, I used my own wonky house design, cut on the Cricut. I used my Scor-it board to create the horizontal lines, which remained white when the house was inked. I had no mica for the windows so I used vellum with a dot pattern on it. All snow on the tag is Ranger's White Enamel Accents (first time I'd used it, and I LOVE IT).

Tree - I didn't have a bendy Prima branch thingy, so cut my own winter tree on the Cricut, inked it dark brown and snowed it with enamel accents.

Holly wreath - I didn't have any mini holly garland, so I cut a wreath and bow shape on the Cricut and coloured with Promarkers.

Fence - my own design, again cut on the Cricut.

Ticket - I had no Cut'n'Dry felt to make a custom ink pad (and to be honest, if I did, I don't think I'd do it anyway!). I inked the stamp in black and used a baby wipe to remove ink from the parts I didn't want to show as black and stamped it. I did the same again with green ink, then with red. I think it turned out pretty well! :)

I'm a day behind, so I'd better get a move on with day 2! :)

Wednesday 1 December 2010

There's no people like Snow People!

"Snow People" is the theme over on the Gingersnap Creations blog this week. Does anyone else remember those old animated shows from the 60s of Rudolph the Red Nosed Reindeer and Frosty the Snowman? I have them on DVD and plan on having a viewing session as the holidays get closer, to get me in the mood! :)

Die-cut elements were my own designs cut on the Cricut and colour was courtesy of Distress Ink pads and Promarkers. The snowman is a Tim Holtz stamp. There is Rock Candy stickles on the snowflakes, but as ever, it doesn't really show up in the photo!

Pop over to the GC blog to see how the other DT members have interpreted the challenge - go on, you know you want to! :)

Tuesday 30 November 2010

Spin me round again and rub my eyes

No aims, objectives, rhyme, reason, grand plan or little idea with this one, just a bit of semi-random messing about :)

I wanted to try out some stamps I hadn't used a lot, I wanted to have a go with my tiny attacher, which I'd never used and I wanted to incorporate some words of a song I've been listening to lately by Imogen Heap. (love her! So creative and innovative, hear the song here if you're interested). Oh, I also wanted to investigate tissue tape masking, a la Wendy Vecchi.

So, there you have it - I achieved all those things, and no one was hurt in the process, a great result all round! :)

Monday 29 November 2010

Oh no, another Santa tag!!

Over on the Simon Says Stamp & Show Challenge blog today the new theme is "make a tag". I'm really loving all of the vintage Christmas images that Tim Holtz has released through Stampers Anonymous, so I thought I'd give this Santa an outing :)

He was stamped with Fired Brick and Black distress inks and then coloured with a red pen. Rock Candy stickles was used to give some sparkle to the ornaments. I planned on doing a whole lot more to this tag, but when I got to this stage I thought that adding more would spoil it rather than improve it, so I left it as it was!

Our ever-generous sponsor Simon Says Stamp is offering a $25 gift voucher again this week! The winner will be chosen at random from those who enter the challenge, so why not give it a try?


Saturday 27 November 2010

Freebie #58!

Christmas Village House
[ETA - This file is no longer available here]

Another Friday, another freebie!

So many of you liked this house when I posted it the other day that it was pretty clear what my freebie should be this week! :)

The house in the photos was sized so that I could fit 2 on 1 sheet of A4 or letter card.

Please remember you are only allowed to download this file for your own use and may not share it or distribute it to others in any form. I spend a great deal of time creating my designs, please respect the terms under which they are shared.

Again, this template will be "live" for 1 week. Next week it will be taken down. Don't forget, if you have any requests, pass them on! I can't promise, but I will take suggestions into account when planning future templates.

These files may not be uploaded to a group, forum or website for sale or redistribution, or shared among individuals. They are expressly for the personal use of each person that downloads them from this blog.

There are 2 files and I have put it into a zip file to make downloading easier. After saving it, open in the usual way, and drag the file out onto your desktop or wherever you wish to save it.

There are 2 versions of each template:
  • An SVG version which can be imported into the Sure Cuts a Lot or Make the Cut program and then cut out on your Cricut.
  • A DXF version which is Craft Robo friendly, and ready to be imported into your Robomaster software (I'm not a Robo user, so if there are any problems with this, please let me know!)
Simply click on the appropriate button below to download the file!

Any feedback on the templates is more than welcome, and if you have any suggestions for possible future templates you'd like to see, please let me know! If you make anything using one of the templates, please post a link to it here so that others can be inspired by how you've used them!

I hope you like the templates - let me know how you get on! :)

Templates © dan99crafter@gmail.com 2010

Friday 26 November 2010

Just hear those sleigh bells ring-a-ling!

I'm not sure why I've picked that title, there's not a sleigh in sight here, but the song is in my head right now so that will have to be reason enough! :)

The tag, reindeer and "believe" were cut on the Cricut. (The reindeer I think was designed by Denise from Boca - I've contacted her to confirm that, and if it is I will put in a proper credit and link).

All stamps were Tim Holtz @ Stampers Anonymous and colour was mostly distress ink pads, with a bit of promarkery thrown in for good measure! Rock Candy stickles was wiped over the letters. As ever, click on the image for a larger view. Comments welcomed! :)

Thursday 25 November 2010

If I knew one end of a saw from the other...

... perhaps I'd be able to try and make these for myself! Unfortunately I don't, so I had to buy these wooden blocks when I saw them in a shop today. They're all scuffed and scratched up - goodness knows I spend enough time doing that to the things that I make myself that I couldn't resist these! :) Plus, they've set wheels in motion in my head, which is never a bad thing :)

Wednesday 24 November 2010

A Christmas Village Starts with 1 House...

I've meant to do this for a couple of years or so now, create my own Christmas village to go under my Christmas tree. Designed in Inkscape then cut on the Cricut using the SCAL program, this is the first house I've made, and I must say I'm pretty happy with it!

I stood it on a light box so I could get an idea of what it would look like with a little light inside it. I left a small mouse hole on the back of the house for the wires to go in and out of. I haven't decided if I'm going to leave them all white, make them all kraft or make them from patterned cardstock. How would you make yours? I hope you like it, click the image for a larger view :)

ETA: To answer Anonymous's question, yes, this was cut from white cardstock, but it's very heavy weight. I don't know what it would be in the US pounds system, but here in Europe it's probably 240 or 300 gsm.

Tuesday 23 November 2010

A Christmas Card for the 21st Century

I decided that I was going to make a Christmas card for today's post, so I was sitting at my desk, thinking about Santa, angels, holly, bells - all the usual components of such things.

My mind started to focus on angels and the realisation that the angels we frequently see in Christmas cards, dressed in flowing gowns, are only dressed that way because that was how people dressed at the time they were painted. Likewise the hairstyles, ethnicity and so many other characteristics of a traditional angel are really only things that were reflections of the taste and norms of their time.

I decided to make an urban, modern Christmas card, showing an angel that demonstrated a more contemporary style, and this is what I came up with. I'd like to think that 21st century angels might look a bit like this! I hope you like it :) All comments welcomed!

(By the way, see that strip of Cosmo Cricket cardstock? I have held onto that for 3 years and this is the first time I've used it - it almost killed me to cut into it - I know a lot of you will know the feeling! LOL)

ETA: The main image is by PaperArtsy, from their Urban Snapshots range (www.paperartsy.co.uk)

Monday 22 November 2010

"Alive"

Over on the Simon Says Stamp & Show Challenge blog today the new theme is "Distress Inks". I've had the song "Alive" by the Psychedelic Furs going around in my head for several days now, so hopefully this will help me to forget it! :) Although I think this piece works on it's own, the lyrics might give you a clearer picture of what was going through my head as I created each tile. Start from the top left corner and work left to right :)

"One time, just for a moment, I had time on my side. I felt like one in a million, I fell out of the blue. I feel dumb, I can't speak, I feel blind, I can't see. All my life. Some days are wide as the ocean, sun goes down and it's gone. I'll be sad when it's over, I'll be down when it's done. For once in my lifetime I'm not sad. For once in my lifetime I'm not down. For once in my life."

The background tiles were distress inked and some were water-stamped. Glossy accents were used to create tears on one of the tiles. I hope you like it, as ever, click on the image for a larger view :) All comments appreciated! :)

Our ever-generous sponsor Simon Says Stamp is offering a $25 gift voucher again this week! The winner will be chosen at random from those who enter the challenge, so why not give it a try?


Saturday 20 November 2010

Freebie #57!

Rosette and centre

[These files are no longer available here]

Just when you'd thought there weren't going to be any more freebies! :)

There are so many of these rosettes floating around the internet at the moment, largely due to that fact that they were recently re-popularised by Tim Holtz when he released one as part of his range of Sizzix dies. A few days ago, a friend on one of the forums I belong to asked me if I would design a rosette for her that she could use in SCAL. Once it was finished, it only made sense to share it here too :)

I've included files for the rosette itself and for the zig-zag edged centre circle. I added them separately so that you could easily change the size of one to suit your needs without having to resize the other if you didn't want to :) I've also included folding notches to make the folding easier, but if you don't want these just cut the shape in blackout mode. Remember to cut an extra circle to glue on the underside of your rosette so that it keeps it's shape!

Please remember you are only allowed to download this file for your own use and may not share it or distribute it to others in any form. I spend a great deal of time creating my designs, please respect the terms under which they are shared.

Again, this template will be "live" for 1 week. Next week it will be taken down. Don't forget, if you have any requests, pass them on! I can't promise, but I will take suggestions into account when planning future templates.

These files may not be uploaded to a group, forum or website for sale or redistribution, or shared among individuals. They are expressly for the personal use of each person that downloads them from this blog.

There are 2 files and I have put it into a zip file to make downloading easier. After saving it, open in the usual way, and drag the file out onto your desktop or wherever you wish to save it.

There are 2 versions of each template:
  • An SVG version which can be imported into the Sure Cuts a Lot or Make the Cut program and then cut out on your Cricut.
  • A DXF version which is Craft Robo friendly, and ready to be imported into your Robomaster software (I'm not a Robo user, so if there are any problems with this, please let me know!)
Simply click on the appropriate button below to download the file!

Any feedback on the templates is more than welcome, and if you have any suggestions for possible future templates you'd like to see, please let me know! If you make anything using one of the templates, please post a link to it here so that others can be inspired by how you've used them!

I hope you like the templates - let me know how you get on! :)

Templates © dan99crafter@gmail.com 2010

Friday 19 November 2010

A (Gr)inchie Christmas Card

I hesitate to call this a Christmas card, as it was thrown together with so little effort I'm embarrassed! Having said that, I didn't set out to make a card at all, I had realised earlier that I hadn't stamped some of the Inkadinkado clear stamps I got a few weeks back, so had a little play with them to see how they'd turn out. I don't plan on sending this out to anyone, but it gave me a chance to play around with arranging the images and see how they worked in relation to each other. Having said that, there is a LOT of Rock Candy Stickles glitter on this, and it looks a whole lot better in the flesh than it does in this scan! :)

Thursday 18 November 2010

Hints from the Hopeless, #38

Black and grey do not work well as prominent colours in a potential Christmas card.

Oh, and while I've got your attention, accidentally making Santa wear badly applied make-up in an attempt to make him more jolly-looking is also a less than successful approach to adopt! lol


Best wishes, Dan x
Making the mistakes first, so you don't have to!

Wednesday 17 November 2010

OK, so I set myself a little challenge...

I don't know how you store your stamps, but apart from my Tim Holtz stamps which come on their own storage sheet, all of mine go onto laminated storage sheets either that I have made or bought. I stamp the images onto card before laminating, or if I'm using a store bought storage sheet, I stamp the images onto it with Stazon. My sheets aren't grouped by theme or manufacturer - when I get new stamps they're separated to fill gaps on existing sheets or I start a new sheet if needed. Not very organised, but it works for me :)

I set myself the challenge of creating a tag using only stamps from 1 storage sheet, which I picked at random from my collection. The sheet I chose is shown here so that you can a) see that I didn't cheat and b) see what a bizarre mix they were! LOL Click on it for a larger view if you wish :)

Here is the tag I came up with. Note the crafty use of the column stamp to divide up the background (crafty - I made a pun! lol). The background was coloured with distress ink pads and the elements of the composition were either promarkered or distress inked. The end result doesn't particularly mean anything or say anything, but I like to think it's kinda pretty. By my criteria at least! :)

Tuesday 16 November 2010

Appearances can be deceptive!

Just a throw-awayidea I've had floating around in my head for a few days, in keeping with the theme of some of the pieces I've been working on lately. Now that I've made this I've got it out of my system and can move on :) I guess there are two ways you can look at this - which is the role being played by these people, the clown or the profession? Only you can decide :)

As ever, click on the image for a larger view. All comments welcomed! :)

BTW, let me apologise for the quality of this photo - the passport photos I used in this piece (by Darkroom Door) are glossy, so every time I used the flash to take the photo I got glare all over the place. In the end I had to turn the flash off, so the image isn't as well lit as it might have been. Hopefully you get the general gist though!) :)

Monday 15 November 2010

If it makes you happy...

(Of course now I have that darned Sheryl Crow song stuck in my head, lol)

Over on the Simon Says Stamp & Show Challenge blog today the new theme is "whatever makes you happy". I had to give this one a bit of thought - I guess I need to spend more time thinking about what makes me happy, I didn't have a clue at first! LOL I decided in the end that what makes me happy in a crafting way is have a good old messy play, and trying things for the first time.

There were a couple of things that I'd had at the back of my mind to try but hadn't gotten around to, and I decided to try them out with this piece. The first was using distress ink directly onto wood, which I did on the frame. I stamped on the frame and then applied distress inks with a foam applicator. It worked really well, but I felt it was a little too bold for the effect I wanted and distracted from the main piece, so I knocked it back by sponging some white paint on top of it.

The other thing I tried out was using dried-out, ink-stained baby wipes that I had used on earlier projects. I stamped onto it in a couple of places used it as a sheer layer to mask some stamping in another area. A word of warning - if you try this, be very careful if you dry it with your heat gun, the material shrivels up at the slightest overheating!

The background was inked, spritzed, dried, water-stamped, stamped and just generally beat up a bit :) As ever, click on the image to see a larger view. All comments appreciated! :)

Our ever-generous sponsor Simon Says Stamp is offering a $25 gift voucher again this week! The winner will be chosen at random from those who enter the challenge, so why not give it a try?


Sunday 14 November 2010

3rd Time's The Charm!

This is the last Santa tag you'll see from me - when I close my eyes I can see them dancing in front of me! LOL I like the snow much better on this one, it was stamped with a paint splattery image and makes nicer snow I think. I'm going to do half of my tags like this and half like the Santa with holly one. (Like many of you, my family don't really appreciate or understand how much time and effort go into these things, so I've tried to make a trade off here between how good it looks and how quickly copies can be made!).

Saturday 13 November 2010

Taggin' Along Again!

OK, so let's make one thing clear right from the get-go. I liked yesterday's tag, in fact I really liked it a lot, and so did many of you, which is great, and I thank those of you who left kind comments :) I did kinda feel though, that it was kinda messy where the holly met the face, so here is version 2. I like that the right side of the tag is dark, it makes for a better contrast with Santa's face, but I think the snowflakes are maybe a little large. What do you think? I do have a smaller snowflake stamp, so perhaps version 3 will appear tomorrow, only time will tell! :) Once again, there's a lot of Rock Candy Stickles on here, but it's only really caught the light in the photo on a corner of one of the snowflakes.

As ever, click on the image for a larger view, and thanks again for the comments, I really appreciate them! :)

Friday 12 November 2010

O Christmas Tag, O Christmas Tag...

I've decided this year that I'm going to wrap my Christmas gifts in brown (kraft) paper (which I may or may not decorate with stamping - the jury is still out on that one!). There are two main reasons for this: a) I'm cheap, and Ikea sell rolls of the paper for less than a pound :) and b) I really love that rustic, kraft kinda look.

Consequently, tonight I started to think about what I might use for tags. I had a single piece of 12x12 kraft cardstock in my drawer and using my Cricut and SCAL I managed to cut 12 2x4 tags from the sheet, along with 12 circles for the reinforced hole.

I wanted to create the feeling of the Christmases I remembered from childhood, so Tim Holtz's vintage-styled images were perfect. I stamped the Santa first, then masked him off and stamped the holly. I trimmed the edge of the tag to match with Santa's hat and then coloured with Promarkers and a touch of Fired Brick distress ink on his cheeks. I used a Ranger white pen for the snow and gave Santa a thin coating of Rock Candy Stickles (applied with my finger) for a bit of extra bling :)

Next, I used a glue pen to stick the circle reinforcement in place and used my Crop-o-dile to make a hole in it. Finally, I was about to thread some jute twine through the hole when I remembered that I bought this red and white butcher's twine waaaaaay back in the spring, intending it for just this purpose! Talk about forward planning, huh? :)

I hope you like, as ever, click to see a larger view :) Oh, and speaking of Tim Holtz stamps, there's still time to enter this weeks Simon Says Stamp and Show Challenge, where the theme is "my favorite Tim Holtz stamp", and there's a $25 gift coupon up for grabs! :)

Monday 8 November 2010

O the Tims, They Are A-Changin'!

Over on the Simon Says Stamp & Show Challenge blog today the new theme is "Your Favorite Tim Stamp". You'd think I might have found this a difficult choice, given that I own most of Tim Holtz's stamps, and love most of them too. In fact, the reverse is true, I have one clear favorite - his "David" stamp, which has been my favorite from the moment I saw it!

The bowler hat and moustache were cut on the Cricut using SCAL. Any other extra items were hand drawn, as needed. The backgrounds were cut from the Lost and Found paper stack and the frames were 97p each at Ikea :)

David was stamped with a Memento Tuxedo Black ink pad, then coloured with Promarkers and Distress Inks.

Why not pop over to the challenge blog and see the amazing entries by the rest of the design team? Even better, join in the fun! :)

Our ever-generous sponsor Simon Says Stamp is offering a $25 gift voucher again this week! The winner will be chosen at random from those who enter the challenge, so why not give it a try?


Monday 1 November 2010

Not too shabby (though a little bloody!)

Over on the Simon Says Stamp & Show Challenge blog today the new theme is "Shabby". I've been somewhat handicapped this week after a rather gruesome kitchen accident a few days ago. Without (hopefully) giving TMI, I sliced the end of my finger off in a cheese grating accident! Of course, as luck would have it, I injured the very hand that I use for crafting. This weeks project is therefore mostly made of papers, with a little stamping.

Shabby or Shabby Chic really isn't my style, and I struggled a little with this. As ever, click the pics to see a larger view!

Why not pop over to the challenge blog and see the amazing entries by the rest of the design team? Even better, join in the fun! I know there are lots of you out there who will take this theme and really run with it! :)

Our ever-generous sponsor Simon Says Stamp is offering the awesome blog candy shown below! The winner will be chosen at random from those who enter the challenge, so why not give it a try?


Wednesday 27 October 2010

Eggplant, Pumpkin and Avocado


"Eggplant, Pumpkin and Avocado" is the theme over on the Gingersnap Creations blog this week. Right from the moment I read the theme for this challenge, I knew exactly what I was going to do - not the most complex of cards, certainly, but I knew that David would look striking in these 3 colours!

Colour was provided courtesy of Promarkers - I had ones called eggplant and pumpkin, but I couldn't for the life of me find an avocado one (which surprised me, as I have all of the colours so maybe I've misplaced one? I used moss instead, which, for all I know, might grow on avocado trees, so let's keep it as our secret!). The glow around the shadow of the head was achieved using the Promarker blender pen to lighten the eggplant background.

Pop over to the GC blog to see how the other DT members have interpreted the challenge - go on, you know you want to! :)

Monday 25 October 2010

There's someone at the door!


Over on the Simon Says Stamp & Show Challenge blog today the new theme is "something spookay". I've been watching the dvd box set of "American Gothic" lately, so I was inspired by the phrase "there's something at the door" (those of you who are fans of the show will know what I'm talking about).

Using SCAL and my cricut I designed and cut a door panel with a keyhole in the centre of it and also cut out some of my bare tree design. Using a host of Tim Holtz products including stamps, distress ink pads and his sanding block, the spookiness was achieved. I finally finished it off with a blood drip cut on the cricut. I hope you like it :) As ever, click the pics to see a larger view!

Why not pop over to the challenge blog and see the amazing entries by the rest of the design team? Even better, join in the fun! :)

Our ever-generous sponsor Simon Says Stamp is offering a $25 gift voucher again this week! The winner will be chosen at random from those who enter the challenge, so why not give it a try?


Monday 18 October 2010

Tishoo, tishoo, we all fall down!


Over on the Simon Says Stamp & Show Challenge blog today the new theme is "Anything But a Card". Since I still have more empty walls to fill here at home, I decided to make a shadow frame piece.

I covered the frame with tissue tape, the first time I've used it, and I must say I love it - so quick and easy to get a good result! This is a bit of a Tim Holtz extravaganza, as it includes several of his stamps, the Lost and Found pad, salvage stickers and a bit of idea-ology metal.

I hope you like it :) As ever, click the pics to see a larger view!

Why not pop over to the challenge blog and see the amazing entries by the rest of the design team? Even better, join in the fun! :)

Our ever-generous sponsor Simon Says Stamp is offering a $25 gift voucher again this week! The winner will be chosen at random from those who enter the challenge, so why not give it a try?


Monday 11 October 2010

Metally Challenged!

Over on the Simon Says Stamp & Show Challenge blog today the new theme is "Metal". Since I submitted a 10 Seconds Studio metal piece for last weeks "Numbers" challenge, I thought I'd take a different tack with this one.

I stitched across the tag with copper wire (and it was REAL copper wire, not the silver stuff with brown dye on it!) and twisted some of it to make a heart embellishment with a key in the centre. Inevitably, other metal crept into frame too, including the two screw head brads (which I love, and though I have lots of them I'm already worrying about the day they're all gone, lol). The red heart was made with white paper clay which was then coloured.

This is also the first project I've photographed with my new camera and everything seems to be in focus - YAY! :)

I hope you like it :) As ever, click the pics to see a larger view!

Why not pop over to the challenge blog and see the amazing entries by the rest of the design team? Even better, join in the fun! :)

Our ever-generous sponsor Simon Says Stamp is offering a $25 gift voucher again this week! The winner will be chosen at random from those who enter the challenge, so why not give it a try?


Related Posts with Thumbnails