This weeks theme on the Simon Says Stamp and Show Challenge is "Tim and Tags". I could have gone with inspiration from Tim's 12 Tags of Christmas, but decided instead to just use a lot of his products on my Christmassy tag!
I decided not to use Promarkers on this card, for a change, and went back to my trusty Koi waterbrush to paint Santa with Distress Stains. I really enjoyed doing it, will have to do that more often! :)
Our ever-generous sponsor Simon Says Stamp is offering a $50 gift voucher as the prize again this week! The winner will be chosen at random from those who enter the challenge, so why not give it a try? At the very least why not head over to the Challenge Blog to see how the other members of the design team have interpreted this weeks theme! :)
This weeks theme on the Simon Says Stamp and Show Challenge is "Through the Looking Glass - Projects with Depth". This 3D diorama card is over 2 inches deep, so fits the challenge perfectly! This has always been one of my favourite Christmas songs, though when you actually listen to it it's kinda depressing! LOL The Polar Express movie played it's part in the inspiration for this too :)
I've used rock candy stickles on the snowflakes and it always saddens me that the sparkly frostiness of it is never done justice in a photo! White enamel accents that I used for the snow on the tree branches is wonderfully dimensional, but alas that too is lost in this picture!
Our ever-generous sponsor Simon Says Stamp is offering a $50 gift voucher as the prize again this week! The winner will be chosen at random from those who enter the challenge, so why not give it a try? At the very least why not head over to the Challenge Blog to see how the other members of the design team have interpreted this weeks theme! :)
I thought I'd have another bit of a go with the sewing machine on this card. I have to admit, I'm quite liking this sewing malarky so far ;) Add to that, it features my favourite stamp of all time, and I was quite the happy bunny making this! :)
This weeks theme on the Simon Says Stamp and Show Challenge is "Elements of Time". I've been itching for an opportunity to use one of the Tim Holtz idea-ology pocket watches, so this was my chance! :) It looks so authentic in real life!
I've had this wooden glass-fronted shadow frame for ages so it's nice to put it to some use finally. I started by staining the inside with black soot Distress Stain and then covering the frame and lining the compartments with designs from the DCWV Tattered Time card stack. I have the pocket watch pride of place in the centre (this piece looks so much better irl, you can really see that each section is about 3/4 inch deep).
Other elements were either stamped with Tim Holtz stamps or cut from the Tattered Time papers, then mounted on 3D foam. I added in some genuine watch faces and parts and a generous sprinkle of idea-ology sprocket gears.
Hopefully my friend likes it - she's promised not to look at my blog until she gets it! :)
Our ever-generous sponsor Simon Says Stamp is offering a $50 gift voucher as the prize again this week! The winner will be chosen at random from those who enter the challenge, so why not give it a try? At the very least why not head over to the Challenge Blog to see how the other members of the design team have interpreted this weeks theme! :)
These files are no longer available from this blog. Use the "Contact Me" button if you need files you have seen here or elsewhere on my blog.
Those of you who follow my blog regularly will know that I make my designs available for download here for 1 week and then I remove them. As the holidays are approaching fast I thought I'd make a change and repost a file from last April, which I thought would be perfect for a quick holiday gift!
I know that we all put a lot of love and care into the cards we make,
using a range of interesting techniques and materials, but this is definitely not
about that, speed is the essence here! This is about "Oh no, I need a gift for DS2's teacher by
8am tomorrow, what am I gonna do???".
I'm sure that like me you have waaaaay more sheets of patterned cardstock and paper than you will ever use! Many of them are lovely enough to stand on their own as the front of a simple card, so when time is short, why not let them help you out?
With a little forward planning (keep a few pre-cut boxes aside, ready to go when you need them) there's no reason why you shouldn't have a nice gift ready to go in less than an hour! It took me only 30 minutes to assemble this box and make 10 simple cards to go inside it. I used plain white 5x5 cards and envelopes which were 50 for £4, or 8p (12 US cents) each, with a matte and panel on each cut from my ever growing mountain of cardstock. Let's be honest, the cards aren't going to win any craft prizes, but the if the papers you use are lovely, then the cards are perfectly presentable! How often have we all seen plain cards just like these in museum gift shops or artsy stores?
Here's a quick video demo of how to fold and construct the boxes. It shows the construction of the base, but the lid is assembled in exactly the same way.
Here is a size guide that shows what size you need to cut each template to produce a particular size of box. Sizes are in inches!
Box size
Base w/h
Lid w/h
3 x 3
5.2
4.77
3.5 x 3.5
6.04
5.54
4 x 4
6.9
6.3
4.5 x 4.5
7.76
7.06
5 x 5
8.62
7.85
5.5 x 5.5
9.5
8.625
6 x 6
10.34
9.38
6.5 x 6.5
11.22
10.14
Please remember you are only allowed to download these files for your own use and can not
share them or distribute them to others in any form. I spend a great deal
of time creating my designs, please respect the terms under which they
are shared.
Don't forget, if you have any
requests, pass them on! I can't promise, but I will take suggestions
into account when planning future templates.
These
files may not be uploaded to a group, forum or website for sale or
redistribution, or shared among individuals. They are expressly for the
personal use of each person that downloads them from this blog.
There are 3 files and I have put them into a zip file to make downloading easier.
After saving it, open in the usual way, and drag the files out onto your
desktop or wherever you wish to save them.
There are 3 versions:
An SVG version which can be imported into the Sure Cuts a Lot or Make the Cut program and then cut out on any of the machines supported by SCAL and Make the Cut.
A DXF version which is Craft Robo
friendly, and ready to be imported into your Robomaster software (I'm
not a Robo user, so if there are any problems with this, please let me
know!)
A Printable version which can be imported into your graphics or Word program, sized to suit your needs, printed and then cut out with scissors or a craft knife.
Simply click on the appropriate button below to download the file!
Any
feedback on the templates is more than welcome, and if you have any
suggestions for possible future templates you'd like to see, please let
me know! If you make anything using one of the
templates, please post a link to it here so that others can be inspired
by how you've used them!
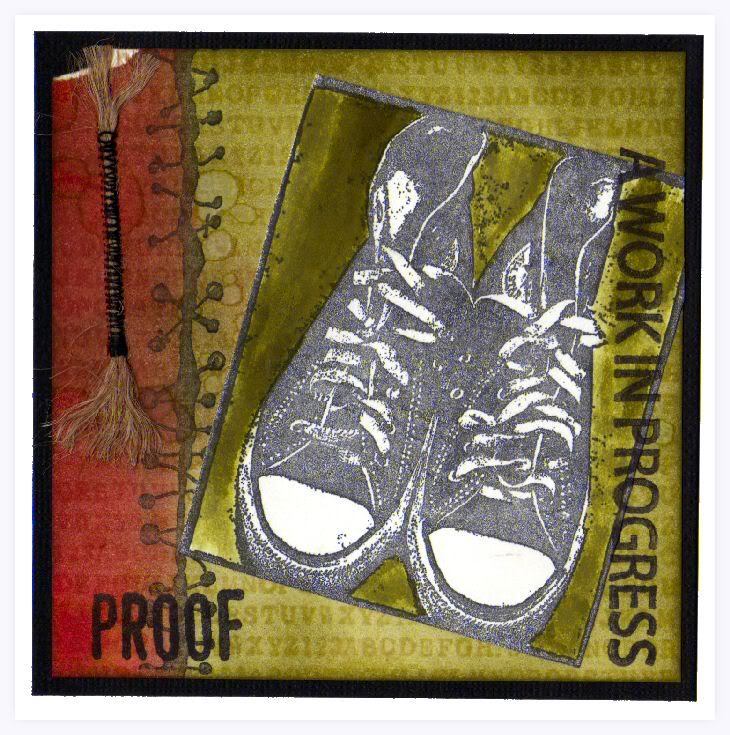
I say that cos halfway through making this card I thought to myself "this looks more like a poster for a missing child" lol I dunno, maybe some of you are thinking that too. And that's fine :) Really. :)
I think that while I was making it, forefront in my mind were things like "the way we were", "years passing", "lost youth" etc I'll be the first to admit that those aren't the cheeriest of birthday thoughts, and rest assured that I didn't include an insert that said "You're older! HA HA!" :) For me, my happiest times crafting are when I just go with the flow, playing about without much planning or particular technique or materials in mind, and this was certainly one of those occasions, and I think that long after the birthday is over this card might still have a life as a little piece of art all of it's own :). Fingers crossed :)
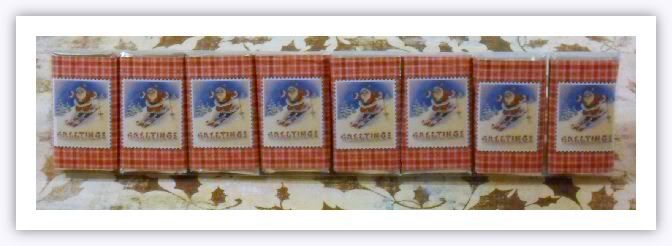
You may know that I've decided to make a lot of my gifts this year, I mentioned it a few weeks back when I showed my corn relish jars. Well, my mum loves white chocolate, so I've made these individual little bars of white chocolate with almonds and dried fruit in them too. I'm especially pleased with the label, which I designed on the computer and printed out. (I say "designed" but I really can't take much of the credit! The Santa postage stamp came from Vintage Holiday Crafts and the background was a free Shabby Princess fall design that I colourised red and rescaled.)
I plan to make more of these, with different chocolate and different fillings. I'll change the colour of the checked paper and use a different stamp on each one, so watch this space! :)
Edit to add:
After posting this, I got to thinking about how I might package these up to make a nice gift. I took an OHP transparency and cut it to size then folded it on my scoring board to make a plastic sleeve like the ones you often see in stores on this kind of item. I'm pretty happy with how it turned out! :)
This weeks theme on the Simon Says Stamp and Show Challenge is "Stars". I'm a big fan of the Retro Grunge pad, and this star paper is one of my favorite designs from that stack. It makes a great cover for this pocket journal, don'tcha think? :).
I finished it off with some stamped detail in the central recessed panel and an Idea-ology tassel chain. This is all ready now to become a stocking filler for someone! :)
Our ever-generous sponsor Simon Says Stamp is offering a $50 gift voucher as the prize again this week! The winner will be chosen at random from those who enter the challenge, so why not give it a try? At the very least why not head over to the Challenge Blog to see how the other members of the design team have interpreted this weeks theme! :)
This weeks theme on the Simon Says Stamp and Show Challenge is "tickets". I really love the vintage photos that feature in Tim Holtz's Lost and Found paper stack, so used some of them on this card.
I also tried the versamark shabby resist technique on two of the panels. I stamped the ornate border with clear versamark ink and dried it with my heat gun. I then applied distress ink over the top of it, and it gave a white resisit where the image had been stamped. More subtle than regular stamp-emboss resist techniques, but very effective! Really great to be able to use the ticket paper in two different scales on the same card too, I love how it looks. Plus I got busy with the sewing machine, I think I threw everything at this card! lol
Our ever-generous sponsor Simon Says Stamp is offering a $50 gift voucher as the prize again this week! The winner will be chosen at random from those who enter the challenge, so why not give it a try? At the very least why not head over to the Challenge Blog to see how the other members of the design team have interpreted this weeks theme! :)
This weeks theme on the Simon Says Stamp and Show Challenge is "Women only". I've made this card using a female design from a female designer - Wendy Vecchi! I've got a dodgy knee right now, so this is just a short post, hopefully back to normal soon!
Our ever-generous sponsor Simon Says Stamp is offering a $50 gift voucher as the prize again this week! The winner will be chosen at random from those who enter the challenge, so why not give it a try? At the very least why not head over to the Challenge Blog to see how the other members of the design team have interpreted this weeks theme! :)


 Our ever-generous sponsor Simon Says Stamp is offering a $50 gift voucher as the prize again this week! The winner will be chosen at random from those who enter the challenge, so why not give it a try? At the very least why not head over to the Challenge Blog to see how the other members of the design team have interpreted this weeks theme! :)