Pages

Tuesday, 30 September 2008

Video Tutorial - Blurred Focus and Water Stamping Techniques

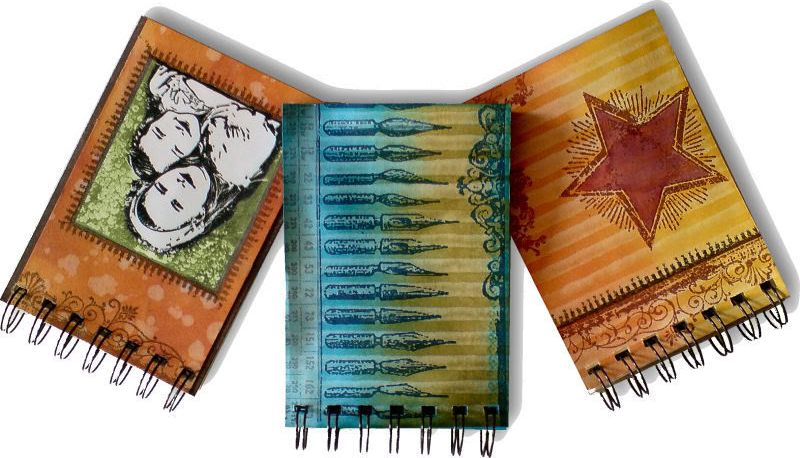
In this 2-part tutorial, I will be showing you how to make cool wire-bound notepads like the ones shown above - perfect as stocking stuffers or teacher gifts!

In part 1, we'll look at 2 interesting stamping techniques, one using water instead of ink, and one using a single inkpad for a tone-on-tone effect (you can use different colours too, like I did with the image of the two girls above).

In part 2 (tomorrow) we'll focus on the basics of binding projects with the Bind-it-all machine, including a fool-proof method of easily positioning your holes on projects longer than 3 inches! I know from the emails I've received in the past that many of you are intimidated by binding with more than 6 holes, as you're concerned about knowing where to punch the holes correctly. Hopefully that problem will be a thing of the past! There will also be a chance to win one of the samples I made during the video!!

If you're not familiar with techniques of blending distress inks, start by checking out my earlier tutorial here!

Monday, 29 September 2008

Jukebox Joy!!

Look what I won in a contest on the Cricutlovers Yahoo group! (A great bunch of friendly people in that group btw... check it out here if you're a cricut owner!) Well, I won it a little while ago, but I was only just able to collect it in the past few days.

A few days after I joined the group they had a quiz, with a Cricut Jukebox as the prize. The questions were related to the group, so as a new member I knew absolutely none of the answers. I decided to join in anyway, and I just made up some funny answers and sent them in. Apparently the kind lady that had donated the prize laughed so much at my answers, they awarded a Jukebox to me too!! How cool is that? :)

Huge thanks to Kim from Cutters Creek for sending the prize, it's much appreciated!! :) (Oh, and Kim? I think you may have sent me a faulty one. I've been putting dimes in the slots on the top all day, and it still hasn't played any of my songs! LOL)

Sunday, 28 September 2008

Feeling pleased with myself!

After longer than I care to contemplate, I have finally organised my distress ink pads! No more scrambling around in a cardboard box, looking at every pad until I found the right one. I bit the bullet and bought the storage tin for them made by Cropper Hopper. Next thing I know, a (VERY) cheap dymo label maker fell in my basket too! Result? Alphabetised inky paradise! :)

(Sorry about the blurry/grainy pics, my camera was playing up).

Saturday, 27 September 2008

Saturday Freebie #17

Are you a horticulture vulture?

[EDIT - These files are no longer available from this blog. Email me for details of how to obtain previous files!]

It's Saturday again, and that can only mean one thing - it's time for some new, original, FREE shapes for you to download!!

Today's selection are garden tools - great for men's cards or for scrapping some of those summer "garden in bloom" photos!!

I don't have access to my Cricut this week, so if anyone would care to cut them and post a comment to let others know that they cut well, I'd be very grateful! Click on the images to see a larger view.

Again, these templates will be "live" for 1 week. Next Saturday, they will be taken down, and new ones will replace them. Don't forget, if you have any requests, pass them on! I can't promise, but I will take suggestions into account when planning future templates.

These files may not be uploaded to a group, forum or website for sale or redistribution, or shared among individuals. They are expressly for the personal use of each person that downloads them from this blog.


Because there are 3 files, I have put them into a zip file to make downloading easier. After saving it, open in the usual way, and drag the templates out onto your desktop or wherever you wish to save them.

There are 3 versions of each template:
  • A printable version (PNG files) that you can import into a program like Word, then resize, print, cut out and use like any other paper template (these are NOT Word files, so don't use File/Open in Word! Use Insert/Picture to bring them into a Word document).
  • An SVG version which can be imported into the Sure Cuts a Lot program and then cut out on your Cricut.
  • A DXF version which is Craft Robo friendly, and ready to be imported into your Robomaster software (I'm not a Robo user, so if there are any problems with this, please let me know!)
Simply right click on the appropriate button below, and choose "save link..." or "save target..." and save your template!

Any feedback on the templates is more than welcome, and if you have any suggestions for possible future templates you'd like to see, please let me know! If you make anything using one of the templates, please post a link to it here so that others can be inspired by how you've used them!

I hope you like the templates - let me know how you get on! :)

Templates © dan99crafter@gmail.com 2008

Monday, 22 September 2008

Getting Figgy With It!

[EDIT - I understand some of you have had difficulty in finding the show on TVWeekly that has instructions on how to make these boxes. The link is here!]

Yes, yes, it's another of those TVWeekly organisers.

Yes, yes, I know that you're bored with them now.

Yes, I promise I won't blog any more of them!

This is the 3rd I've made, and the 3rd type of fastening I've tried. I like this one best, ribbon bradded onto the front and flap, to be tied in a bow. IMO it looks the nicest so far, and also fastens best! I used Basic Grey Figgy Pudding for the top, and Bazill for the bottom.

Click on the pics to enlarge them, I hope you like it! :)


Sunday, 21 September 2008

Organised Skulls

Another of those TVWeekly organisers, this time for a friend who gave me two sugar skulls she made for a mexican festival (5th May? I can't remember!) She likes that sort of thing, so hopefully she'll like this too! :) I decorated it with the skull from my Halloween freebies a couple of weeks back. Oh, I made the tassel myself too, but only cos I keep forgetting to buy some!

Saturday, 20 September 2008

Saturday Freebie #16!

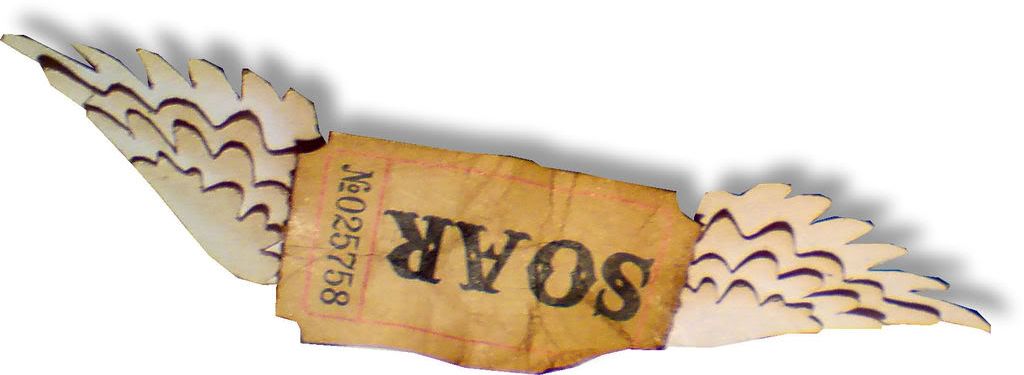
Wings Aint What They Used To Be!

[Edit - These files are no longer available from this site. Email me for details of how to access past design collections]

It's Saturday again, and that can only mean one thing - an awful pun for the title of this post! No, that's not what I mean, I mean it's time for some new, original, FREE shapes for you to download!!

Today's selection are wings - use them for angels, fairies or even as shown below!!

Here are images of the files, along with an idea of what the cut example will look like. As usual, I have cut these out on the Cricut before uploading them, to make sure that they cut as they should! Click on the images to see a larger view.

Again, these templates will be "live" for 1 week. Next Saturday, they will be taken down, and new ones will replace them. Don't forget, if you have any requests, pass them on! I can't promise, but I will take suggestions into account when planning future templates.

These files may not be uploaded to a group, forum or website for sale or redistribution, or shared among individuals. They are expressly for the personal use of each person that downloads them from this blog.


Because there are 2 sets of files, I have put them into a zip file to make downloading easier. After saving it, open in the usual way, and drag the templates out onto your desktop or wherever you wish to save them.

There are 3 versions of each template:
  • A printable version (JPG files) that you can import into a program like Word, then resize, print, cut out and use like any other paper template (these are NOT Word files, so don't use File/Open in Word! Use Insert/Picture to bring them into a Word document).
  • An SVG version which can be imported into the Sure Cuts a Lot program and then cut out on your Cricut.
  • A DXF version which is Craft Robo friendly, and ready to be imported into your Robomaster software (I'm not a Robo user, so if there are any problems with this, please let me know!)
Simply right click on the appropriate button below, and choose "save link..." or "save target..." and save your template!

Any feedback on the templates is more than welcome, and if you have any suggestions for possible future templates you'd like to see, please let me know! If you make anything using one of the templates, please post a link to it here so that others can be inspired by how you've used them!

I hope you like the templates - let me know how you get on! :)

Templates © dan99crafter@gmail.com 2008

Thursday, 18 September 2008

Photo-Organiser-type-thingy

Does anyone else out there in blogland watch the shows from TVWeekly? I joined their site a while back and I get an email from them everytime there's a new episode - some I watch, some I don't. Tonight I actually tried one of their projects for the first time, and it won't be the last!

They have a great system, you watch the show, then you download the step by step instructions and follow them. It made the whole thing really easy to do, and (if I say so myself) it came out just as nice as the one in the show! How often can we say that about instructions we've followed? Oh, just in case you want to try this one yourself, the file tabs on each section were cut from one of my freebie files from a few weeks ago, they're not part of the original project.

BTW... this was the first project I've made with my new ATG gun - it's my new favourite toy! :)

Anyway, here are the pics. (It's a gift for a friend that did me a favour recently, I hope she likes it!)

[EDIT] A few people have asked me what an ATG gun is. It's an adhesive tape dispenser made by 3m. I have the ATG 700 which takes 1/2 inch tape, but you can also get an adaptor for it that lets it take 1/4 inch tape. The tape has a very strong bond, so is great for minibooks or projects like this one. It's under £2 for 44m of tape, which works out VERY cheap when compared to the small tape runners you can buy in craft/scrapbook stores. The gun itself is a big outlay initially (£13 on Amazon UK, a lot more expensive in the USA, oddly!), but pays for itself in a matter of weeks if you use a lot of those tape runners.

Sunday, 14 September 2008

Birthday Thanks...

Many thanks to everyone who came today to celebrate my birthday! It was lovely to see so many friends, and it was a perfect day. Thanks too for the awesome cards, cake and gifts, both handmade and stash-related!!

I'm going down to Alphabet Street


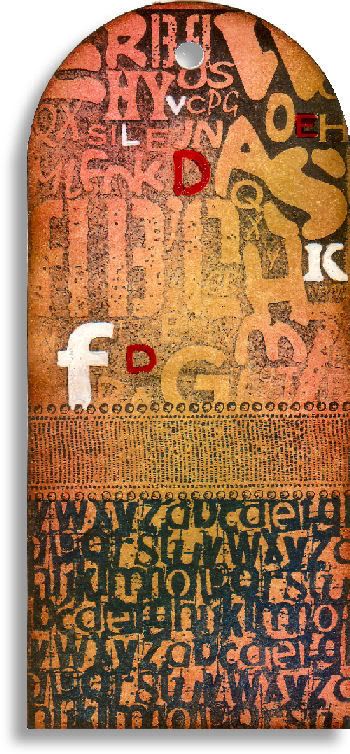
I was delighted to be asked to set the challenge for this week's Sunday Stamper. As you may know, Hels chooses a song title to be interpreted in a stamped piece, so, after some thought, I chose "Alphabet Street". I even listened to the song while I made this tag! I hope you like it, and thanks Hels for the challenge! :)

Click on the image for a larger view!

Saturday, 13 September 2008

Saturday Freebie #15!

There's Snowflakes Like Home!

[EDIT: These files are no longer available via my blog. Email me for details of how to access them]

It's Saturday again, and that can only mean one thing - an awful pun for the title of this post! No, that's not what I mean, I mean it's time for some new, original, FREE shapes for you to download!!

Today's selection are snowflakes - useful for cardmakers, scrapbookers and all-round paper-crafters! No holiday project is complete without them!!

Here are images of the files, along with an idea of what the cut example will look like. As usual, I have cut these out on the Cricut before uploading them, to make sure that they cut as they should! Click on the images to see a larger view.

I covered this box frame with gold acrylic paint and distressed it before stamping on it with Archival ink and colouring the images with Sakura gel pens. All the stamps I used on the frame and inside it were from the wonderful Victorian Christmas plates by the Artistic Stamper. I coloured the snowflakes red and stamped on them, just to try something a little out of the ordinary!! I think they suit this project well, and if you squint, they almost remind you of poinsettias!

Again, these templates will be "live" for 1 week. Next Saturday, they will be taken down, and new ones will replace them. Don't forget, if you have any requests, pass them on! I can't promise, but I will take suggestions into account when planning future templates.

These files may not be uploaded to a group, forum or website for sale or redistribution, or shared among individuals. They are expressly for the personal use of each person that downloads them from this blog.


Because there are 4 files, I have put them into a zip file to make downloading easier. After saving it, open in the usual way, and drag the templates out onto your desktop or wherever you wish to save them.

There are 3 versions of each template:
  • A printable version (JPG files) that you can import into a program like Word, then resize, print, cut out and use like any other paper template (these are NOT Word files, so don't use File/Open in Word! Use Insert/Picture to bring them into a Word document).
  • An SVG version which can be imported into the Sure Cuts a Lot program and then cut out on your Cricut.
  • A DXF version which is Craft Robo friendly, and ready to be imported into your Robomaster software (I'm not a Robo user, so if there are any problems with this, please let me know!)
Simply right click on the appropriate button below, and choose "save link..." or "save target..." and save your template!

Any feedback on the templates is more than welcome, and if you have any suggestions for possible future templates you'd like to see, please let me know! If you make anything using one of the templates, please post a link to it here so that others can be inspired by how you've used them!

I hope you like the templates - let me know how you get on! :)

Templates © dan99crafter@gmail.com 2008
Saturday, 6 September 2008

Saturday Freebie #14!!

Fee Fie Faux Postage!!

[EDIT - These files are no longer available! Email me for details on how to access previous weeks files!!]

It's Saturday again, and that can only mean one thing - an awful pun for the title of this post! No, that's not what I mean, I mean it's time for some new, original, FREE shapes for you to download!!

Today's selection are faux postage edges. They can be cut as-is to get the edge on their own, or cut as blackout to get a post-edged plate! Cut them out in any size you like, in the cardstock of your choice! Great for scrapbooking or cardmaking - why not use them as fun edging for photos on a page, or to enhance stamped pieces as shown here?

Here are images of the files, along with an idea of what the cut example will look like. As usual, I have cut these out on the Cricut before uploading them, to make sure that they cut as they should! Click on the images to see a larger view.

Again, these templates will be "live" for 1 week. Next Saturday, they will be taken down, and new ones will replace them. Don't forget, if you have any requests, pass them on! I can't promise, but I will take suggestions into account when planning future templates.

These files may not be uploaded to a group, forum or website for sale or redistribution, or shared among individuals. They are expressly for the personal use of each person that downloads them from this blog.


Because there are 4 files, I have put them into a zip file to make downloading easier. After saving it, open in the usual way, and drag the templates out onto your desktop or wherever you wish to save them.

There are 3 versions of each template:
  • A printable version (JPG files) that you can import into a program like Word, then resize, print, cut out and use like any other paper template (these are NOT Word files, so don't use File/Open in Word! Use Insert/Picture to bring them into a Word document).
  • An SVG version which can be imported into the Sure Cuts a Lot program and then cut out on your Cricut.
  • A DXF version which is Craft Robo friendly, and ready to be imported into your Robomaster software (I'm not a Robo user, so if there are any problems with this, please let me know!)
Simply right click on the appropriate button below, and choose "save link..." or "save target..." and save your template!

Any feedback on the templates is more than welcome, and if you have any suggestions for possible future templates you'd like to see, please let me know! If you make anything using one of the templates, please post a link to it here so that others can be inspired by how you've used them!

I hope you like the templates - let me know how you get on! :)

Templates © dan99crafter@gmail.com 2008

Friday, 5 September 2008

"Win a Tag" Results

Thanks so much to everyone who took the time to leave feedback on my video tutorial earlier this week! I said I'd pick 5 names out of the "hat" and send a tag to each person (actually I went to random.org to get random numbers to choose them).

If you left one of the comments below, please get in touch with your address, and I'll get the tag sent off to you!

Corrina said...
Great tutorial Dan, thanks, love the subtle look and colouring you get by applying the ink like this.
Corrina

Joanne said...
Great tutorial dan! The tag looks great!

Anonymous said...
This is great, Dan! Thanks for the tutorial.
Marie-José from the Netherlands

Hels said...
Wow, fab, groovy Dan....loved your tutorial...you dulcet tones were the perfect accompaniment to a great project :O)) Thanks for doing this - you should be doing this full time for some big inky manufacturers...cos you knock spots off others I have seen xxx

AnnM said...
Thanks Dan for the great tutorial - I can see now why mine never look as good as others I have seen! I'll try out your method.

Tuesday, 2 September 2008

Video Tutorial - Distress Inks 101

A few weeks ago a few people asked me to create a tutorial on how I blend Ranger's Distress Ink pads when I use them on a project. It has taken me longer than I'd hoped, but here is the result, my first ever video tutorial!! Many thanks to Jane3865 for the loan of the camera and to Jayne from Puffin Crafts for operating the camera and allowing me to film in their store!

Win a tag! (NOW CLOSED)
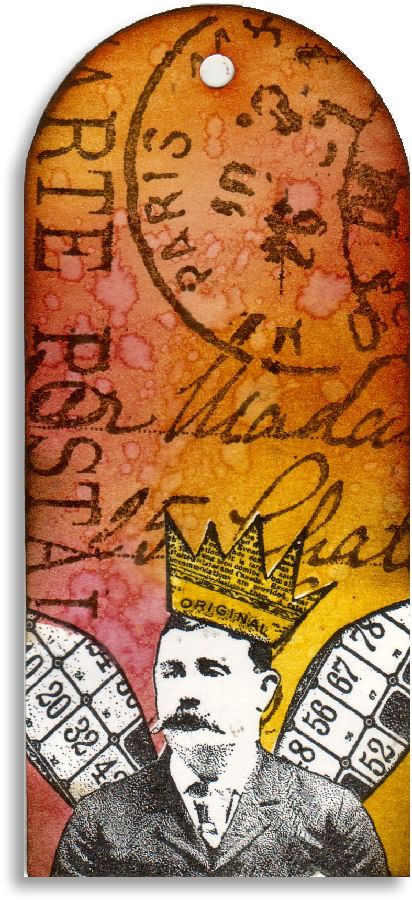
During the tutorial, I create the tag on the right (actually, I made 5, what with fluffing my lines and having to start over again, LOL). If you leave a comment on this post, 5 names will be picked at random and a tag will be sent to each of those people! Click the tag for a larger view.

To attempt this tutorial, you will need:
  • Rubber stamps
  • Acrylic block (if necessary)
  • A black water-resistant ink pad, such as Versafine or Staz-on
  • Distress ink pads in 4 or so colours
  • A Ranger alcohol ink applicator or ink blending tool (they're the same thing!) - If you don't have one, you can apply the ink without it, but you may not get such a graduated result
  • Squares of cut'n'dry foam, with adhesive velcro on the grey side, or squares of ink blending foam, which already have velcro on the back when you buy them
  • A non-stick craft mat
  • A water brush or an artist's paintbrush and a pot of water
  • Some post-it notes
  • Scissors or a craft knife
Note: If you're using an alcohol ink tool for this (as I do) you can NOT use the felt pads that come with it for this technique - they are for applying alcohol inks, which I do not use in this tutorial. You need to use Ranger's Ink Blending Foam, or foam pads you cut from a sheet of Cut'n'Dry foam!

Good luck, and let me know how you get on!