Wednesday 31 October 2007

Christmas Tag

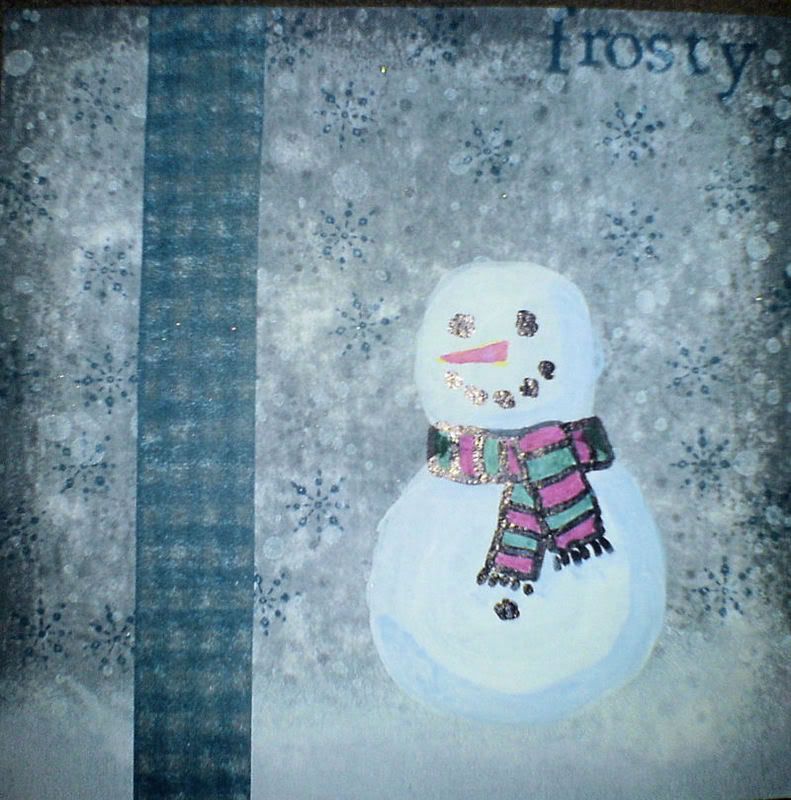
6" x 3" tag made for a swap that I'm taking part in. The main criteria is that it should use rubber stamping. I will put ribbons through the top, but it was easier to scan in without them! Fired brick and black soot distress pads, acrylic clear border stamps, clear santa stamp and pine trees stamp were used.

Click on the tag for a larger view.

Monday 29 October 2007

Halloween colours birthday card


I thought I'd break with my usual style and try a bit of digi-card making. I used papers and accents from shabby princess and 2 peas in a bucket for this, and must say I really enjoyed making it. And my hands were clean at the end of it!! :oD

Click on the picture if you want to see a larger view.

Sunday 28 October 2007

Alice Revisited

By special request, I have created a flipbook of Alice Revisited, a project I did last year. I made 4 or 5 copies of this, all of which have now passed into other hands, so special thanks to my friend Andrea for scanning this for me!

Click on the picture below to open it, then use your mouse to turn the pages by clicking and dragging!


P.S. If it doesn't work for you, your browser may not have the latest version of the bit it needs to see the book. You can get it by following this link:

Click here to update your Flash player

Click on the slide show images below to see a gallery of the pages in this project!


Friday 26 October 2007

The Palest Ink

This Bind-it-all project was inspired by Chinese proverbs. I used alcohol inks on a few pages as there is apparently a threat of them no longer being sold in Europe (I hope that's not true!)

Click on the still image below to see the flipbook version. For those of you that liked the white arrows I put on the last flipbook I made, I apologise. Due to a technical hitch I was unable to add them to this book!

Click on the picture below to open it, then use your mouse to turn the pages by clicking and dragging!


P.S. If it doesn't work for you, your browser may not have the latest version of the bit it needs to see the book. You can get it by following this link:

Click here to update your Flash player

Click on the slide show images below to see a gallery of the pages in this project!

Thursday 25 October 2007

A New Flipbook

Here is a "flippable" version of an earlier Bind-it-All project, In-flight Entertainment.

Click on the picture below to open it, then use your mouse to turn the pages by clicking and dragging!


P.S. If it doesn't work for you, your browser may not have the latest version of the bit it needs to see the book. You can get it by following this link:

Wednesday 24 October 2007

Variation On a Theme

Same stamp as yesterday, different approach.

I wanted the sky on this one to have a semi-realistic/semi-distressed feel, so this time I prepared the mountboard by dabbing white acrylic all over it, rather than wiping it to make brush strokes. This made it randomly lumpy in places and it has trapped colour more in some places than others.

The trees were stamped and embossed with black sparkle embossing powder this time, but I felt they looked far too black, so I smudged some white acrylic over them to make them look a bit more foggy. The bottom half of the stamped image was covered with sponged on white acrylic. After using my finger to create the moon on some previous pages, this time I used the wooden end of a tapestry stamp, as I wanted a more uniform circle. I hope you like it! :o)

Tuesday 23 October 2007

Oil's well that ends well

I tried to make this page look a bit like an oil painting. It's on mountboard, and I started by using a paint dabber to apply a layer of white acrylic paint. I deliberately left "brush marks" in it to give texture to it, and then let it dry. Using baby wipes/paper towel I applied distress inks to create the sky then I stamped the row of pine trees in black soot distress ink across the bottom. Finally I applied more white dabber across the bottom of the page and stamped snowflaks with white versamagic and used a white pen to apply dots for snowflakes.

Monday 22 October 2007

Flipbook - Trying Something a Bit Different

For quite some time now I've been dissatisfied with the way I've been displaying my work on this blog. Most of the things I make are books of one kind or another, and separating the pages and displaying them as individual images seems to me to take away a lot of their fundamental bookiness (I know that's not a real word, but as far as I'm concerned, it is now!). The main point of making a book and binding it is so that the person who looks at it does so by turning it's pages one after another, and that page-turning process is at the core of how we as readers interact with books.

So, I sat down at the computer (you all knew that I'm a rubber stamp geek, but did you know I'm a computer nerd too? lol), and MUCH tearing out of hair later (yes, yes, I didn't have any hair to begin with, I know. Still, it's a bit mean of you to point it out, shame on you!) I've created another version of my "I Know" book that I put up here in my previous post. It should (if it works correctly) allow you to "turn" the pages, and to zoom in and out of any page that you want to get a better view of.

This is how it works


This is the kind of view you will see while you browse through the book. Click your main mouse button on the bottom corner of any page, and holding it down, drag your mouse to turn the page. Letting go of the mouse button will release the page. You can do this to go forwards or backwards through the book. You can also click the other mouse button to zoom in or out.

I'd really value any feedback on this that you care to give! Should I display my past and future books like this too, rather than as regular images? There was quite a bit of effort involved in getting this to work, although now that I've done it, hopefully future examples can be made much quicker. All the same, if most of you don't like looking at the book this way, I'd prefer not to waste my time! LOL

Click here to see the "I Know" Flippable Book

P.S. If it doesn't work for you, your browser may not have the latest version of the bit it needs to see the book. You can get it by following this link:

Update your Flash Player

Saturday 20 October 2007

I Know

Challenged by a friend to make something using scrapbook papers (something I don't do often), this is what I came up with. The song I Know What You're Doing by Dionne Farris is a favourite on my ipod right now, and as I was listening to it when I started this, I used some of the lyrics as the text.

It's a Maya Road chipboard book, and was covered with Sage and Sky Butcher's Block papers. I've had those for a long time and always liked them, so it's nice to have finally used them on something. I also used some of the new Tim Holtz unmounted stamps, which I'm loving! While on holiday in the USA in the summer I bought some snaps that look like phillips screw heads, and I've used those for the first time here. Am loving those too!

This turned out a lot grungier than I had originally planned, I guess it was just the mood I was in! Oh, and just to say, if I'd actually counted and realised there were 20 sides of chipboard to be worked on, I may never have started it!! LOL

As ever, click on an image if you want to see a larger version. Enjoy :o)

Wednesday 10 October 2007

"Classy" is in the eye of the beholder

I was asked to make a birthday card today, and it had to be "classy". Always a worrying thing to hear!! Anyway, I turned out two examples, and here they are. No fancy techniques, just plain stamping and a bit of tearing. They're even too classy to actually say happy birthday!! Enjoy! :o)

Monday 8 October 2007

A Mixed Bag

2 more Christmas fat pages today, completed in between preparing Thanksgiving dinner (which turned out lovely, thanks very much for asking!).

Enjoy! :o)


Saturday 6 October 2007

Three French Hens

Well, if for "french hens" you substitute "tree branches". 3 variations on a theme here, all using one of my favourite stamps, Tim Holtz's tree branches. Um... and not much else to say about them!! Oh, except the moon on each was made using acrylic paint, and one of my favourite crafting tools, the little finger of my left hand. Enjoy!! :o)

The ceremonial burning of a mermaid

It's Canada, it's Thanksgiving, and that can only mean one thing.... time to burn a mermaid!! Well, perhaps not a traditional Thanksgiving pastime, but it's how we spent our afternoon today. A carved wooden mermaid, bought long ago on a beach in Mexico, was past her best, with a broken tail and two broken arms, so it was time to put her out of her misery. Down to the fire-pit at the bottom of the garden we went, and a toasty time was had by one and all!! :o)

Thursday 4 October 2007

They say things come in threes....

...so here are 3 more christmas fat pages.

I've joined a christmas rubber stampting themed swap list on the Craft Swap forum (http://www.mfbb.net/craftswap for those of you interested in friendly craft-related chat and lots of fun swaps to take part in!). There are 20 people in the list, and we each make 19 pages and send one to each person on the list, at the end we will each have a unique 19 page book of eachother's work. I'm almost 1/2 way through making mine, first time I've ever been ahead of the game! LOL

Similar routine here to the other pages I've made in this set, except that I decided to try out a couple of alphabet stamp sets that I've had for a while and not tried yet!


As ever, comments welcomed! :o)

Wednesday 3 October 2007

They say it comes but once a year....

... but that's clearly a lie!! It's only a couple of days later and Christmas is here again! Rich reds for these ones, always very christmassy in my book, and maybe a little bit of a retro feel too, though that could be down to the stamps I've used. No acrylic paint this time, just distress ink pads. Fired brick distress ink pad was rubbed directly onto the pages to colour them, then rubbed with a wet baby wipe to get the patchy blurry effect. Any extra blur effect is down to my phone camera!

My much loved Tsukineko/Sakura white pen has gotten very sick, it's either dry or dropping great globs of white ink all over the place I haven't been able to find a replacement locally, so I have used a Sakura glaze pen for the snow and beard highlights. Still on limited supplies/equipment and photographed with my phone.


Related Posts with Thumbnails